

Setting Up Your Dart Board: A Step-by-Step Guide
Whether you are a seasoned professional or a novice looking to get into the game, having a properly set-up dartboard can significantly impact you’re playing experience. Setting up a dart board may seem like a straightforward process, but there are precise specifications that need to be met to ensure an accurate and enjoyable game.
In this guide, we'll walk you through the steps to set up your dart board correctly.

Steps to setting up a dart board
Step 1: Choose the Right Location
First, select a suitable location to hang your dartboard. You want an area that is clear of obstacles, with enough space for a throw line (also called the oche) and to accommodate players and spectators. Consider a space that offers at least 11 feet of clearance from the dart board to allow for the recommended throw distance.
Also, ensure the location you select is safe. Ideally, you should have a wall that can absorb any stray darts without being damaged. If you're worried about errant darts, consider adding a protective surround or backboard to safeguard your walls.
Step 2: Measure the Height
According to the World Darts Federation, the dartboard should be hung so that the centre of the bullseye sits 5 feet 8 inches (1.73 meters) from the floor. This measurement is considered the standard for both soft tip and steel tip darts. Measure from the floor straight up to the wall and mark the height where the bullseye will be.
Step 3: Secure the Dart Board
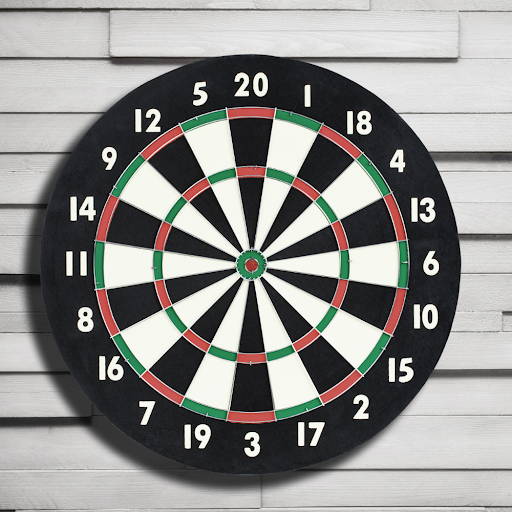
Once you've marked the correct height, it's time to hang your dartboard. Most dartboards come with a hanging bracket. Secure the bracket to the wall on the mark you've made. Then attach your dartboard to the bracket, ensuring that the 20-scoring segment is at the top in the black section.
Step 4: Measure the Throwing Distance
Next, measure out the throwing distance from the front face of the dartboard. For steel tip darts, the oche should be 7 feet 9.25 inches (2.37 meters) from the dartboard. For soft tip darts, the distance should be 8 feet (2.44 meters). Use a tape measure to measure this distance from the dartboard to the floor, then mark this position as your throw line.
Step 5: Level the Dart Board
It's important that your dartboard is level to ensure fair play. Using a level, check the alignment of your board and make any necessary adjustments. The number 20 segment should be directly up, and the bullseye should be flat and not slanting to any side.
Step 6: Mark the Oche
The final step is to clearly mark the oche, or throwing line. This can be done using a piece of tape or any other clear marker. If you want to go a step further, you could use a raised oche. A raised oche not only makes it clear where the throw line is, but it also prevents players from accidentally stepping over as they throw.
Other Factors To Consider
While the steps provided cover the essential aspects of setting up a dart board, there are indeed other factors to consider to maximize your dart playing experience. Let's delve into a few of them.
1. Lighting
Good lighting is crucial in a dart game. You want to ensure the dartboard is well-lit, reducing shadows and making the numbers and segments clear to the thrower. Ideally, use a dedicated dartboard light or ensure that an ambient light source is positioned in a way that it brightly illuminates the board without casting distracting shadows.
2. Floor Protection
Darts that bounce out and hit the floor can damage both the darts and the floor. If you're playing on a delicate surface like hardwood or tiles, consider using a dart mat or a piece of carpet to protect the floor from any accidental dart damage.
3. Noise
Darts hitting the dartboard can make a noticeable amount of noise, which could be an issue in some living situations, such as apartments. If noise might be a problem, consider investing in a dartboard cabinet or a backing board, which can help to dampen the sound.
4. Room for Scoring
You’ll need somewhere to keep score, typically. This could be a chalkboard or whiteboard hung nearby, or you could use a scoring app on your phone or tablet. Whatever you choose, make sure it's within easy reach of the dartboard.
5. Safe Spectator Area
If you're hosting games with multiple players, it's important to establish a safe area for spectators to watch without risk of being hit by stray darts. This area should be out of the line of fire, but still offer a good view of the board.
6. Regular Maintenance
Lastly, remember to regularly rotate your dartboard to ensure even wear and tear. The numbers on the board are removable, allowing you to rotate the playing surface and extend the life of your board. Regularly check your darts too, for any wear and tear, and ensure they're always sharp and in good condition.

Taking these factors into account when setting up your dartboard will not only enhance the playing experience but also ensure safety and prolong the life of your equipment.
Conclusion: Ready, Set, Throw!
And there you have it - your dartboard is set up and ready for play. Whether you're practising alone, hosting a friendly gathering, or organising a competitive match, a correctly set-up dartboard will provide a fair and consistent basis for play. Remember, these measurements are set as per professional standards and following them ensures that you get an authentic darts experience. Now that you've got the set-up sorted, it's time to let the darts fly!
Are you looking for a dart board? check out our Electronic Dartboards


